Introduction – Dialogue Recording
Assessment 1 required me and my partner to extract a 2-3-minute scene from a movie of our choice. We had to then replace all the sound in the scene with sound that we had created ourselves. It was important that we chose a scene with a simple soundtrack, avoiding dialogue if possible as this would make the task easier as we would only need to record specific sounds for that scene instead of dialogue which is difficult to do as every word would have to be in time.
For this assessment I decided to do the opening scene from Back to The Future. The scene commences with a pan of lots of clocks around the room. The scene then moves onto a shot of a TV news report which is then followed by a sequence of action such as a kettle, toaster, and a can opener. After this we then see a door open and a man walk in after dropping a key under the mat, he then puts his skateboard down which rolls across the floor. Shortly after, we see another sequence of actions as the man flicks several switches, dials and plugs in a guitar jack. The scene then ends with a high angle of the plectrum before moving to a black screen.
It was important that we listened to my chosen movie scene before we started recording anything. We listened, identified, and created a check list all of the sounds in each shot. We did this as this means it would be easier for us to keep track of everything that we’ve recorded. This way we could also blend sounds together to create an atmosphere that was appropriate for the scene. Once we were familiar with the scene and confident that we had all of the correct sounds we were ready to move onto recording.
Recording
Once we had gone through all the sounds that appears in the scene we then began setting up to record sounds. We decided that the first sound that we should record is the minute and a half shot of clocks as this seemed like the simplest sound to produce.
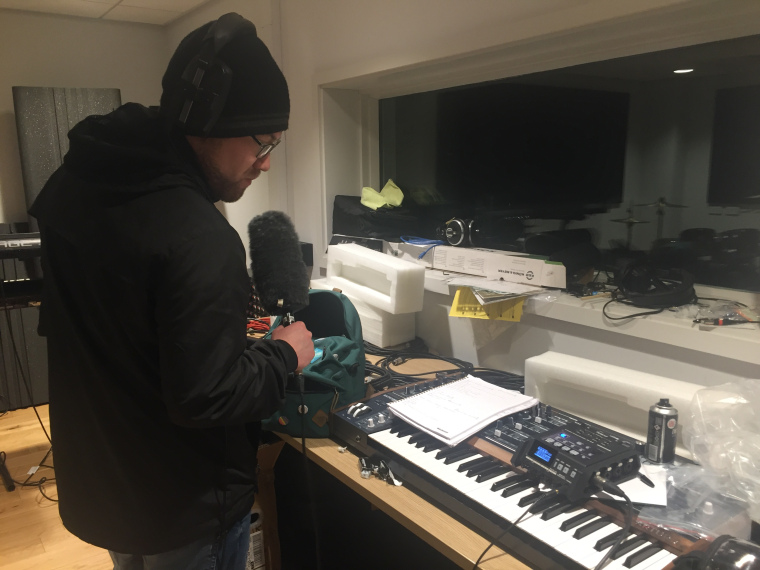
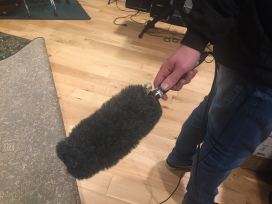
As for the choice of microphone, we came to the conclusion to use the small condenser Sennheiser ME66 Mini Boom Microphone as the sensitivity is higher and directionality at a typical vocal frequency is slightly narrower, due to it being a super-cardioid, so it’s ideal to use further away or to catch a specific sound. A super-cardioid polar pattern is more directional than Cardioid, meaning it can pick up a specific sound better. The overall sound from the Sennheiser ME66 was great as there was minimal background noise. We ensured to use a microphone boom pole as this would prevent any unwanted noises from our hands whilst holding the microphone as the microphone picks up sound very well.
We connected the microphone to the Roland R-44 Portable Audio Recorder via an XLR cable. We used the Roland R-44 as it allowed great sound quality and also allowed us to move around to different places and record sounds whilst using a small, lightweight device. The Roland also has phantom power which is needed for the Sennheiser ME66 to work. Phantom power sends the correct power (+48V) to a condenser microphone through an XLR socket and cable. Everything that we record is sorted on an SD card so before we recorded anything we had to make sure that we formatted the card so that we could save time and find our files without having to go through other people’s files.
We recorded a lot of our sounds in music practice rooms which meant majority of the time the environment was excellent to record in as it was quiet. However, sometimes there was air conditioning on which caused a buzzing in the background of some of the recordings, meaning we had to move to the recording studio. We used a small room as this would mean there would be less reflection in sound. We also used the recording studio which was an ideal environment as it had carpet and acoustic tiles which helps reduce sound reflection.
The final thing we had to do before recording any sounds was to make sure we were recording in mono and not stereo. Overall, I found the process of setting up straightforward, as time went on as it became a routine. In the beginning however, we forgot that the Roland R-44 was recording in stereo which meant we had to record the clocks again.
When recording all of the sounds I found it interesting as I was finding ways of making a specific sound using different items or objects. For example, there is a part in the scene where there is an electric robot arm which moves. For this we used an electrical can opener which represented the sound of the robotic arm. Although, some of the sounds were self-explanatory, such as we made our own footsteps to replace the footsteps in the scene. However, there were a few noises such as when the kettle boils and the water pours onto a cold surface. For this it was difficult to think of ideas that we could use. Therefore, we decided to record a voice hissing and edit the pitch on Logic Pro X so that it sounded like boiling water. This was a simple process which worked better than we expected.
On the other hand, we came across a few problems. The first, most common problem, was there was a bit of background noise in some of the recordings due to the air conditioning. This was frustrating as we had to re-recording the sound and we couldn’t turn off the air conditioning so we had to scout a new location. However, we managed to do it quickly and successfully so we could get back onto editing. Another problem that occurred was sometimes we would accidentally record in stereo instead of mono. This again meant that we had to re-record some sounds.

Post Production
Once we had gathered all the sounds, we then moved onto editing the recordings in Pro Tools. Firstly, we began by taking all the recordings off the SD card and putting them into a file on the Mac. We then created a new project on Pro Tools and imported the video of the scene so that we could work alongside the video for better accuracy with the sound recordings. After we imported the video we then had to import all the sounds so that we could begin editing them to the video and start building everything together.
In Pro Tools there are many techniques that we used to make our sound dub the best that we could. The first technique was the fade tool. This was important as by putting a fade at the beginning and end of each sound recording means we can avoid any harsh clips at the start and finish of each of the sounds. The cross-fade also allowed a smooth transition between two sections of audio. The two sections overlap and as one section fades out the other fades in.
Pro Tools also enabled us to sculpt, shape, and transform recorded audio quickly and build up scenes. In Pro Tools we had to trim all the clips of audio and the video frames for precision placement. This was one of the most important tasks as if the audio was out of sync with the action it would make the video look unprofessional. Another area we had to focus on was the volume and gain levels. Some of the audio was quieter than other tracks so we had to figure out a good balance between all the audio so that nothing was too quiet or too loud for the viewer.
I personally found the process of post-production exciting as it was great to see all our work come together. As we were slowly building all the audio together over the video scene we could see all our hard work that we had put into the project to make it the best we could. When first editing in Pro Tools it was difficult as I had never used that programme before but eventually I felt confident when editing as I became comfortable with Pro Tools.
If we had more time I would suggest spending more time when recording as some of the audio could have been better in terms of quality. However, we had to work with what we had as we had limited time and I feel we worked great with what we had.
Conclusion
Overall, me and my partner worked hard together to accomplish successfully finishing the sound dub assignment. I thoroughly enjoyed the post-production area of this assignment as that is an area I am most comfortable with. I have done a lot of post-production in A-Level Media and Music Technology which meant once I got into it I found it easy. When it came to recording the sounds, I found this more difficult as it took a lot of patience and it was very time consuming. It was a new experience that I think was a great starter, for the next assignments that we had coming up.
